Comments to explain the feeling behind the topic
Summary
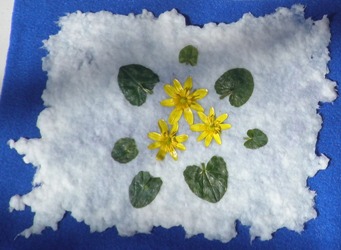
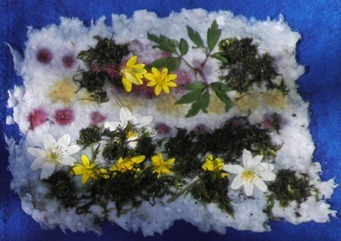
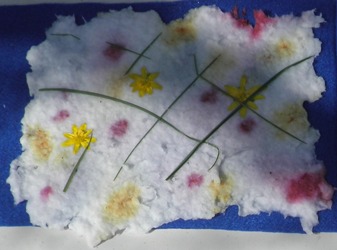
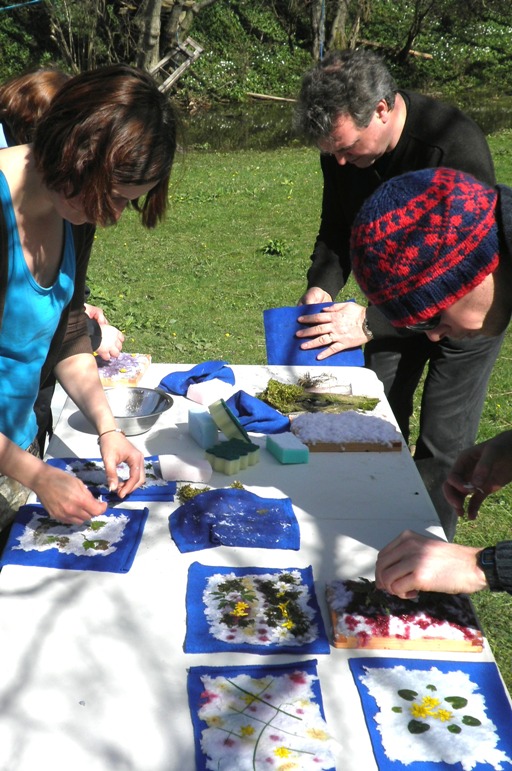
Used paper is pulped and reformed into hand-made paper, combined with all different sorts of interesting plant materials using mesh screens and dried in the sun to create beautiful pieces of art that can be taken home for framing and display, or to make greetings cards or so many other uses of decorative paper.
 |
 |
 |
Paper-making is a great project to carry out in the woods or fields. Children love this project because almost anything they find around them can be incorporated into the paper, like leaves, seeds, berries or even sheep’s wool. It’s also a great way to preserve these objects – much more interesting than pressing leaves between papers under the bedroom carpet!
While making paper with the students we can talk about the most extraordinary natural paper which is made by the oldest paper makers of all wasps! Their beautiful nests are made when they chew up old wood and mix it with their saliva which is then spread out in thin beautiful layers to make their nests.
Some simple tools are needed for paper-making: in particular a blender (liquidiser) – but be careful not to over-load it because they can burn out, causing unpopularity as I have found several times! Sometimes jumble sale blenders still have a few hours of life left in them.
The other required tools are “deckles” – a rectangular frame with wire mesh or gauze stretched across. They can be purchased from art shops or you can make your own – stapling gauze or mesh (from car body repair shops) across a wood frame. Old photo frames or jumble sale picture frames are ideal. They can even be made using old stockings or tights instead of wire mesh, stretched over plastic frames with a knot tied at each end. Finally you will need pieces of fabric the same size as the deckles (Fleece works well), sponges that can be cut into usable sizes for children, and tables to work on.
To start the project a few days before the main event, tear up or shred scrap paper, and leave it to soak in water for a few days. With shredded paper from businesses or the school office, this is a great way for children to learn about paper recycling. If good quality white paper is used then the colours and natural dyes stand out most strongly.
Once the paper is well soaked, it can be mixed in the blender, each load usually about ¾ filled with water. Blend to a smooth pulp, then strain the pulp and dump it in a plastic storage box that can be carried out to the field.
For a deckle of about 20cm by 30cm, put about four cups of pulp into a mixing bowl. Add water, and use hands or a whisk to distribute the pulp into the water, getting rid of lumps. Lower the deckle into the bowl, under the surface of the pulp, and gently move it from side to side until it is evenly coated with pulp. Lift it out and let the water drain back into the bowl. Place the frame on the table, and at this point leaves, feathers, wool or seeds can be added to the paper. Lay out the natural treasures in a thoughtful design, thinking carefully about placement, as they will become part of the paper.
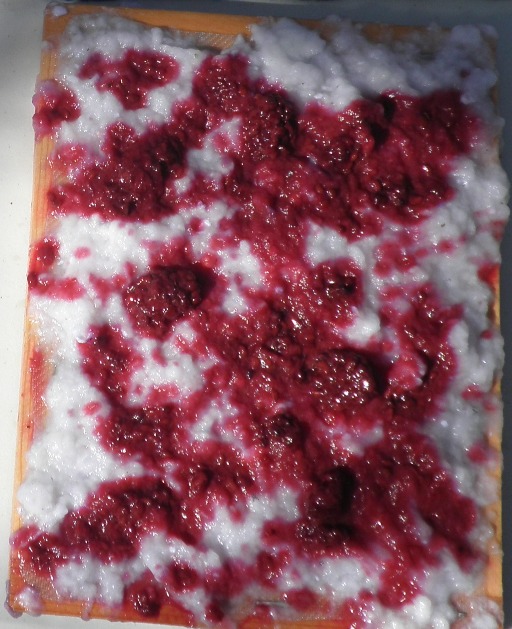
Natural paints can also be added to a separate bowl of pulp, and carefully added into the design using a turkey baster.
When the design is complete, a piece of synthetic fleece fabric (very cheap) the same size as the deckle is laid on top of the design, and with a strong hand against the fleece, flip it over. Using a sponge, press strongly against the mesh with a dabbing action to absorb the water out of the paper, and with a few minutes of dabbing and squeezing out the sponge, the paper will separate and drop away from the mesh. Finally, a piece of fabric or cardboard can be used to flip the design back over to reveal the finished piece.
 |
 |