Comments to explain the feeling behind the topic
Summary
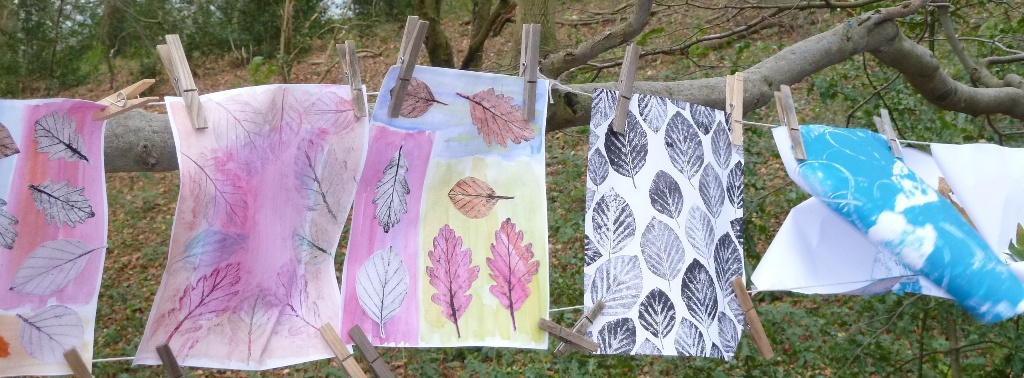
Leaves and other objects from nature are combined with a variety of ink and paint techniques to make interesting and exciting images on paper or fabric. These can be taken home and framed, laminated to make place mats, or the fabric prints can be used as decorative prayer flags or wall hangings.
 |
A walk on a summer evening allows us to find a great variety of different species, and therefore different interesting shapes of leaves. With direction, children are able to focus their attention just on the leaves they find, looking at plants in a new way by questioning and describing the aesthetic qualities of the leaves. There is such a variety, including large, dramatic leaves, heart-shaped ones, long thing leaves and filigree fern fronds. Ask the children to look at the surface: are they prickly, hairy, with sticking out veins, or quite flat? Do the leaves have holes where caterpillars and other bugs have been chewing? All these qualities give leaves their character and affect images we will print from the leaves.
The most straightforward way to mono-print begins with rolling out printing ink on to a waterproof surface like a plastic table cloth or place mat. Let the artists be free with the roller, driving ink in different directions, and possibly blending two or three colours. The ink does not need to end up flat; the rolling marks are transferred on to the printed fabric, showing both marks and movement.
The first part of the process creates a negative image, with the leaf outlines showing clearly against a background of colour. Place the leaves directly into the rolled ink, textured side downward, taking care to lay the leaves out in a way that reflects the desired style of composition. Take time to look at the outlines of leaves against the ink, then lay a clean sheet of printing paper or cloth on top of the leaves. Use hands to rub gently and press the fabric into the ink. Feel for the edges of the leaves, tracing and rubbing the edges to give a really good outline. Lift up a corner and peel away the fabric, enjoying the sense of expectation as the design is revealed. The artists will be excited with anticipation and surprised by the results of their prints.
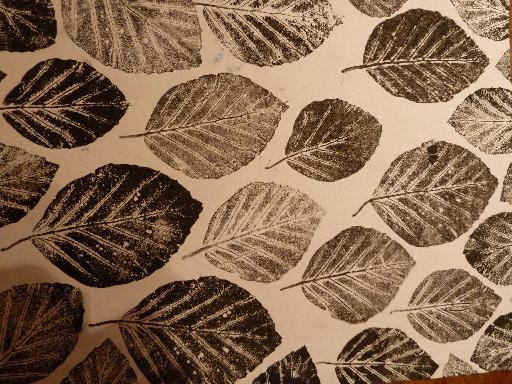
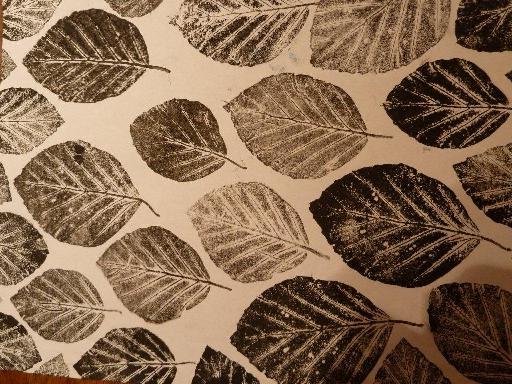
The second stage in the process creates a positive image of the leaves. Lift them out of the ink using a pin, fork or knife to loosen them from the ink. Place them carefully, inky side down, on a clean piece of paper or fabric, without smudging the ink. Think about the design you want as you place them, as they cannot be moved. Lay another clean piece of paper (not fabric) on top, and now rub each one strongly so the details of the shape and texture of the leaves are transferred to the print. The top sheet allows the rubbing to take place without the leaves moving around or disintegrating. Finally remove each leaf carefully from the print to reveal the finished design. As a final touch students could write the name of each leaf species next to the image on the print using a pencil or a pin or sharpened stick, dipped in printing ink.
 |  |